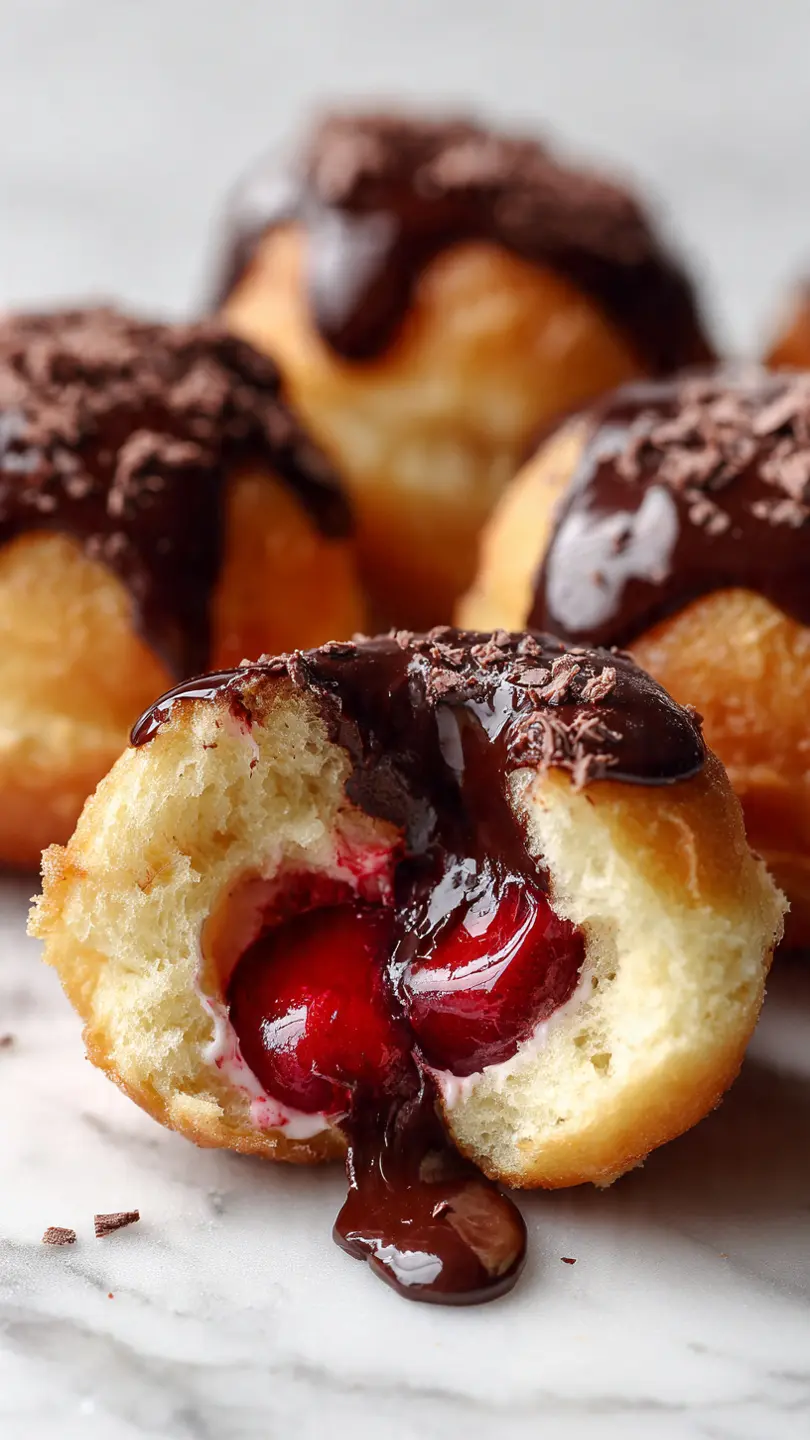
Gooey Peanut Butter and Jelly Traybake Recipe Everyone Will Love
This Peanut Butter Jelly Traybake is the ultimate comfort dessert! It transforms the nostalgic PB&J combo into a warm, gooey, and buttery treat that’s perfect for any occasion. With a soft peanut butter base and swirls of fruity jelly, every bite is packed with flavor. Easy to make and impossible to resist, this traybake is a crowd-pleaser that will have everyone coming back for more.
- Total Time: 35 minutes
- Yield: 12 servings 1x
Ingredients
For the Base:
- 1 cup (225g) creamy peanut butter
- 1/2 cup (115g) unsalted butter, softened
- 3/4 cup (150g) granulated sugar
- 1/2 cup (100g) brown sugar, packed
- 2 large eggs
- 1 tsp vanilla extract
- 1 1/4 cups (160g) all-purpose flour
- 1/2 tsp baking powder
- 1/4 tsp salt
For the Topping:
- 1 cup (250g) fruit jelly or jam (grape or strawberry)
- 1/2 cup (120g) peanut butter, melted
Instructions
1️⃣ Preheat & Prep: Preheat oven to 350°F (175°C). Line a 9×13-inch baking pan with parchment paper.
2️⃣ Mix the Base: In a large bowl, cream together peanut butter, softened butter, granulated sugar, and brown sugar until fluffy.
3️⃣ Add Wet Ingredients: Mix in eggs one at a time, followed by vanilla extract.
4️⃣ Combine Dry & Wet Ingredients: In a separate bowl, whisk together flour, baking powder, and salt. Gradually fold it into the wet mixture until just combined.
5️⃣ Spread the Batter: Pour batter into the prepared pan, smoothing it evenly.
6️⃣ Swirl in the Jelly: Drop spoonfuls of jelly on top, then use a knife to swirl it into the batter.
7️⃣ Bake: Bake for 25-30 minutes, until the edges are golden and a toothpick inserted comes out clean.
8️⃣ Cool & Drizzle: Let it cool, then drizzle melted peanut butter over the top. Slice and serve!
Notes
- Use room-temperature ingredients for a smooth batter.
- Swap creamy peanut butter for crunchy if you love extra texture!
- Try raspberry, apricot, or mixed berry jam for a unique twist.
- Store in an airtight container at room temp for up to 3 days or freeze for later.
- Prep Time: 10 minutes
- Cook Time: 25 minutes
- Category: Dessert
- Method: Baking
- Cuisine: American
- Diet: Vegetarian
Nutrition
- Serving Size: Per Serving
- Calories: 250
- Sugar: 18g
- Sodium: 120mg
- Fat: 15g
- Saturated Fat: 5g
- Carbohydrates: 26g
- Fiber: 2g
- Protein: 6g
- Cholesterol: 30mg
Keywords: peanut butter jelly dessert, pb&j traybake, easy peanut butter recipe, peanut butter jelly bars, peanut butter and jelly bake, nostalgic desserts, peanut butter swirl bars, best traybake recipe, homemade pb&j dessert, quick dessert recipes
Okay, real talk: peanut butter and jelly is the classic combo that’s been holding us down since childhood. But what if I told you we could take that same flavor-packed duo and turn it into something even more magical? Say hello to the Peanut Butter Jelly Traybake. This warm, gooey treat is like a big ol’ hug in dessert form. It’s easy to whip up—I mean, even on one of those lazy Sunday afternoons when you’d rather stay in PJs. Whether you’re throwing a party or just treating yourself after a long week, this traybake is where it’s at. No lie, you’ll probably find yourself going back for seconds… or thirds. Oh, and if you’re into all things peanut butter, you’ve gotta check out the Peanut Butter Pancakes Recipe and the Molten Chocolate Lava Cakes Recipe—both are next-level indulgences.
So, here’s a fun nugget for you: peanut butter and jelly sandwiches became a thing back in the early 1900s. Yup, they were a total game-changer. During WWII, soldiers packed PB&Js as their go-to snack. They’re nostalgic, comforting, and easy—everything you want in a good dessert. But now? We’re giving it a glow-up by turning it into a dessert masterpiece. Turning your childhood fav into a traybake is honestly a no-brainer. It’s a slice of happiness with every bite! Love this kind of sweet twist. You’ll probably adore the Taco Casserole Recipe Guide as a savory counterpart!
Why You’ll Love This Recipe
- Comforting Nostalgia: A fresh take on a classic combo we all know and love.
- Crowd Pleaser: Perfect for sharing at potlucks, holidays, or family nights.
- Simple Ingredients: You probably already have most of these in your pantry.
- Versatile: Mix it up with your favorite jam flavors or toppings.
Ingredients and Tools
Ingredients
For the Base:
- 1 cup (225g) creamy peanut butter
- 1/2 cup (115g) unsalted butter, softened—this adds that perfect richness
- 3/4 cup (150g) granulated sugar
- 1/2 cup (100g) brown sugar, packed (because brown sugar hits differently)
- 2 large eggs
- 1 tsp vanilla extract
- 1 1/4 cups (160g) all-purpose flour
- 1/2 tsp baking powder
- 1/4 tsp salt
For the Topping:
- 1 cup (250g) fruit jelly or jam (grape and strawberry are always classic)
- 1/2 cup (120g) peanut butter, melted
Tools
- Mixing bowls
- Electric mixer or whisk
- 9×13-inch baking pan
- Parchment paper (trust me, this saves you so much effort)
- Spatula
- Offset spatula for smooth spreading

How to Prepare the Ultimate Peanut Butter Traybake
Making this traybake is the easiest win. It’s all about getting that gooey peanut butter base and swirling in the fruity goodness of jelly. Follow these steps for a foolproof baking session.
Step-by-Step Instructions for Perfect Results
Preheat and Prep
- Set the Mood First, preheat your oven to 350°F (175°C). Grab your baking pan and line it with parchment paper. This not only keeps things non-stick but also makes clean-up a breeze.
- Prepare Ingredients Gather your pantry staples. Don’t forget to leave your butter out ahead of time to soften—soft butter mixes so much better.

Mix the Base Ingredients
- Cream the Fats and Sugars In a large mixing bowl, cream together peanut butter, softened butter, granulated sugar, and brown sugar. Mix until fluffy.
- Incorporate Eggs and Vanilla Add eggs, one at a time, and beat until the mixture is smooth and well-blended. Stir in vanilla extract for that subtle kick.

Combine the Dry and Wet Ingredients
- Sift and Mix Dry Ingredients In a separate bowl, sift together flour, baking powder, and salt. Gradually add this dry mixture to the wet mixture and stir until just combined. (Overmixing will make your base too dense.)

Assemble the Traybake
- Spread and Smooth the Batter Pour the batter into the prepared pan, smoothing it out evenly. A spatula works wonders here.
- Add the Jelly Swirls Drop spoonfuls of jelly or jam on top of the batter. Swirl with a butter knife to create those iconic marbled patterns.
- Bake to Perfection Bake for 25-30 minutes. When the edges look golden and a toothpick inserted comes out clean, it’s done.

Decorate and Slice
- Cool and Drizzle Let it cool completely before drizzling melted peanut butter across the top. Slice into squares and enjoy.

Tips for Best Results Every Time
Bake Like a Pro
Key Tips:
- Use Room-Temperature Ingredients:
Cold butter or eggs can throw off your batter, leaving you with lumps or uneven texture. Room-temperature ingredients mix like a dream, giving you that smooth, creamy base you’re aiming for. Pro tip: If you forgot to take your butter out early, microwave it for 10 seconds (just don’t let it melt!). - Don’t Overmix:
Mixing is fun, but overdoing it activates the gluten in the flour. Stir until everything is just combined. Your traybake will thank you! - Go Big with Toppings:
Sprinkle crushed peanuts for extra crunch or mini chocolate chips for decadence. A drizzle of honey adds a glossy finish.
Serving Ideas for Every Occasion
Serve It Up in Style:
1. Paired with Milk
There’s something about a cold glass of milk that just makes PB&J sing. Dunking is encouraged!
2. Dressed Up:
Want to wow your guests? Serve each slice with whipped cream or a scoop of ice cream. Absolute heaven.
3. Party-Ready:
Cut into bite-sized squares for perfect finger food. Arrange on a pretty platter and watch them disappear.
Recipe Variations You’ll Love
Gluten-Free Twist: Bake Without the Gluten, Keep the Joy
If you’re living a gluten-free life, don’t worry—you can still enjoy every decadent bite of this traybake! Just swap out the all-purpose flour for a high-quality gluten-free baking blend (look for one that includes xanthan gum for the best results). The texture will stay perfectly soft and chewy, and trust me, no one will even notice it’s gluten-free.
Steps for Gluten-Free Success
- Use a pre-mixed gluten-free flour blend for simplicity.
- Check your baking powder to ensure it’s gluten-free.
- Bake for the same amount of time as the original recipe.
Who says you have to compromise? This version is proof that everyone can have their cake and eat it too.
Vegan Version: A Plant-Based Delight
For all the plant-based bakers out there, this variation is your jam (literally). Use flax eggs (mix 1 tablespoon of ground flaxseed with 2.5 tablespoons of water for each egg) and vegan butter instead of the usual dairy options. The result? A nutty, gooey dessert that’s just as indulgent and satisfying as the original—but 100% vegan.
Tips for Perfect Vegan Baking
- Let the flax eggs sit for 5 minutes to thicken before mixing.
- Use high-quality vegan butter for the best flavor.
- Ensure your peanut butter doesn’t contain honey if you’re strictly vegan.
You’ll be the star of your next vegan potluck, and even non-vegans won’t be able to tell the difference.
Berry Explosion: Jam Out with New Flavors
Why stick to just one jam when you can mix it up? Try raspberry for a tangy twist, or go bold with apricot for a slightly tart and sweet flavor. Feeling adventurous? Layer two different jams for a multi-berry explosion that’ll have everyone guessing (and loving) what’s in it.
Jam Tips for Ultimate Flavor
- Use homemade jam if possible for extra freshness.
- Mix contrasting flavors like raspberry and apricot for a layered taste.
- Swirl gently to keep the marbled effect intact.
It’s like a flavor party, and everyone’s invited. Go ahead, make your jam game strong.
Crunchy Peanut Butter: Texture Lovers Rejoice
Are you team crunchy peanut butter? Then this one’s for you. Swap the creamy peanut butter for a crunchy version, and let those little peanut pieces add a satisfying texture to every bite. For an extra wow factor, sprinkle a handful of crushed peanuts on top before baking.
Pro Tips for Crunchy Perfection
- Use freshly crushed peanuts for a robust nutty flavor.
- Balance the crunchy texture with smooth jelly for a perfect bite.
- Add a drizzle of melted chocolate for a decadent twist.
It’s the perfect mix of creamy, crunchy, sweet, and salty—basically, dessert perfection. This one will convert even the creamy peanut butter loyalists!
Nutrition Facts Per Serving
| Nutrient | Amount |
|---|---|
| Calories | 250 |
| Total Fat | 15g |
| Protein | 6g |
| Carbohydrates | 26g |
| Fiber | 2g |
Common Mistakes to Avoid
- Skipping Parchment Paper: Makes removal tricky.
- Overbaking: Leads to dry texture.
- Using Cold Ingredients: Results in clumpy batter.
More Recipes You’ll Adore
Here are some other drool-worthy recipes to satisfy your sweet tooth:
FAQs About This Recipe
Oh, 100%! Crunchy peanut butter will take your traybake to the next level. It adds a delightful texture, giving you those satisfying little bits of peanut in every bite. Perfect for anyone who loves a little extra crunch in their dessert.
Honestly, you can’t go wrong with the classics—strawberry and grape always deliver. But if you’re feeling adventurous, raspberry jelly is a total game-changer. It adds a tangy kick that balances the sweetness beautifully. Apricot or mixed berry jams can also bring a unique twist!
Simple! Keep your traybake in an airtight container at room temperature for up to three days. Want to save some for later? Slice it into squares, pop them in a freezer-safe container, and they’ll last up to three months. Just thaw and enjoy whenever you’re ready for a treat.
Absolutely. This traybake is perfect for feeding a crowd! Use a larger baking pan—like 11×15 inches—and keep an eye on the baking time. It might need a few extra minutes to cook through but trust me, it’ll be worth it when everyone’s reaching for seconds.
You bet! Swap out regular peanut butter for unsweetened, natural peanut butter. Pair it with a lower-sugar jelly or even a homemade fruit preserve to dial back the sweetness. This way, you still get all the flavor without the sugar overload.
Conclusion: A Hug in Dessert Form
This Peanut Butter Jelly Traybakee isn’t just a dessert; it’s an experience. With its gooey, nutty base and fruity, swirled topping, it’s like biting into pure happiness. Whether you’re baking for a party, treating your family, or just indulging yourself (because you deserve it!), this traybake has got your back. So, preheat that oven, grab your ingredients, and get baking. Your taste buds are about to do a happy dance! A hug in dessert form. With its gooey base and fruity swirls, it’s pure happiness. Get baking—your taste buds will thank you!