If you’ve ever had a late-night sweet tooth but didn’t want to break out the mixer or spend an hour baking, I’ve got a recipe that’ll become your go-to. These 3 ingredient peanut butter cookies are the kind of treat that reminds me of warm weekends growing up, baking with just a spoon and a smile. No flour, no fuss—just three simple pantry staples and a few minutes of oven time.
They’re soft, chewy, gluten-free (yep!), and incredibly satisfying. Whether you’re whipping up a last-minute dessert or introducing your kids to baking, this recipe couldn’t be easier. And the best part? You probably already have everything you need.
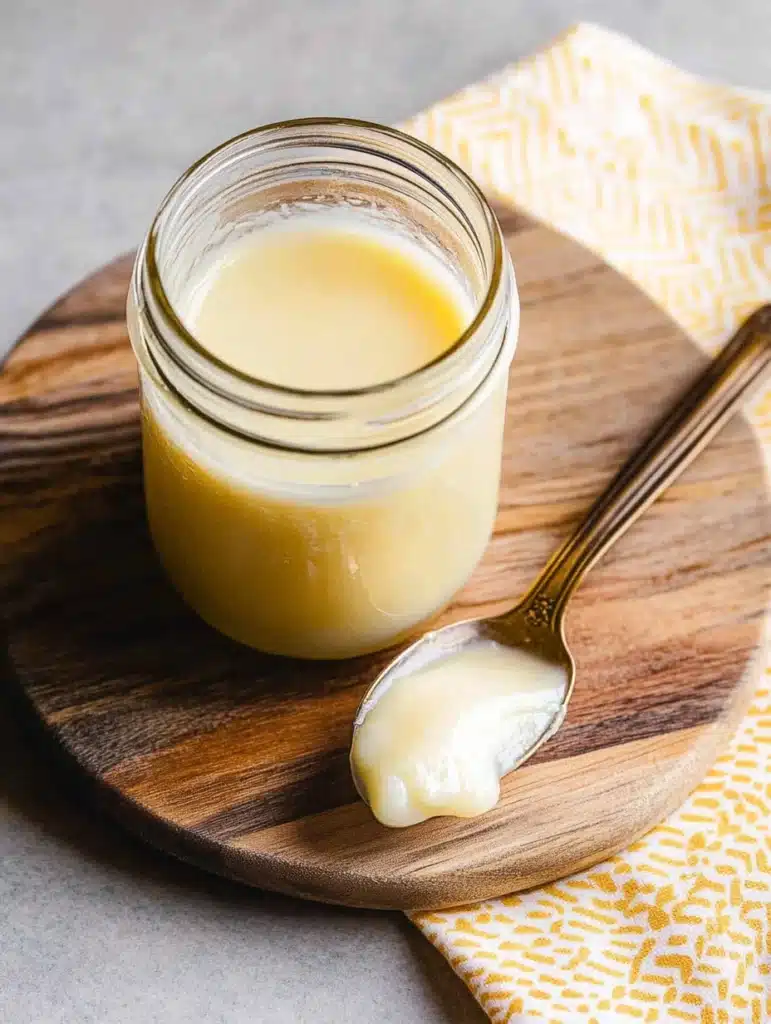
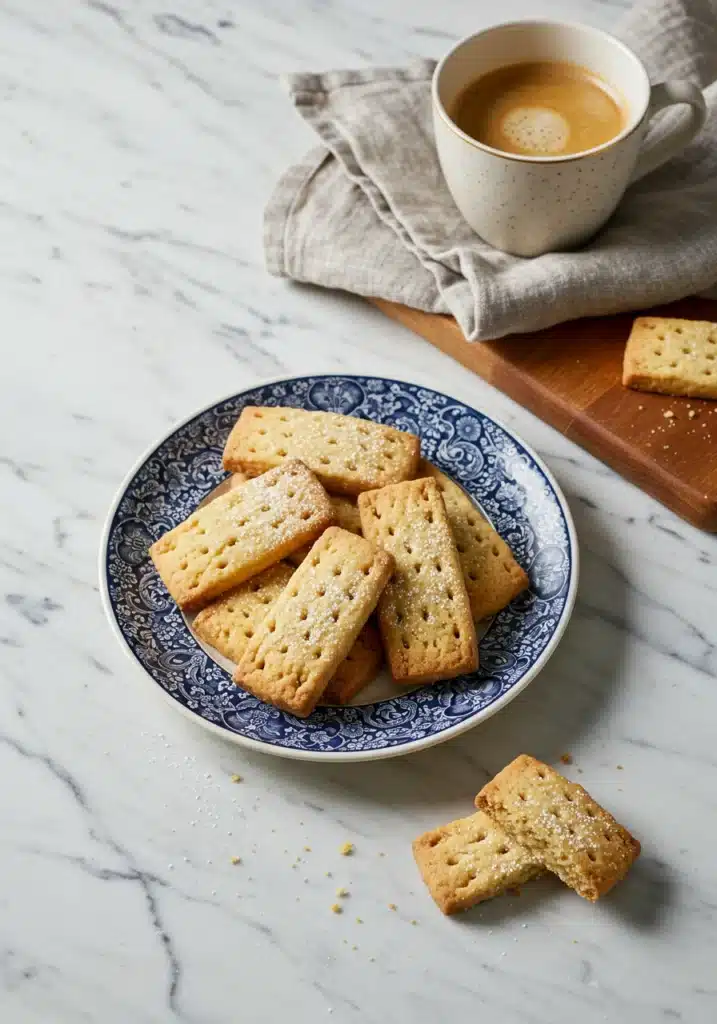
Check out our collection of The Best Shortbread Cookies. It is the perfect solution!
Print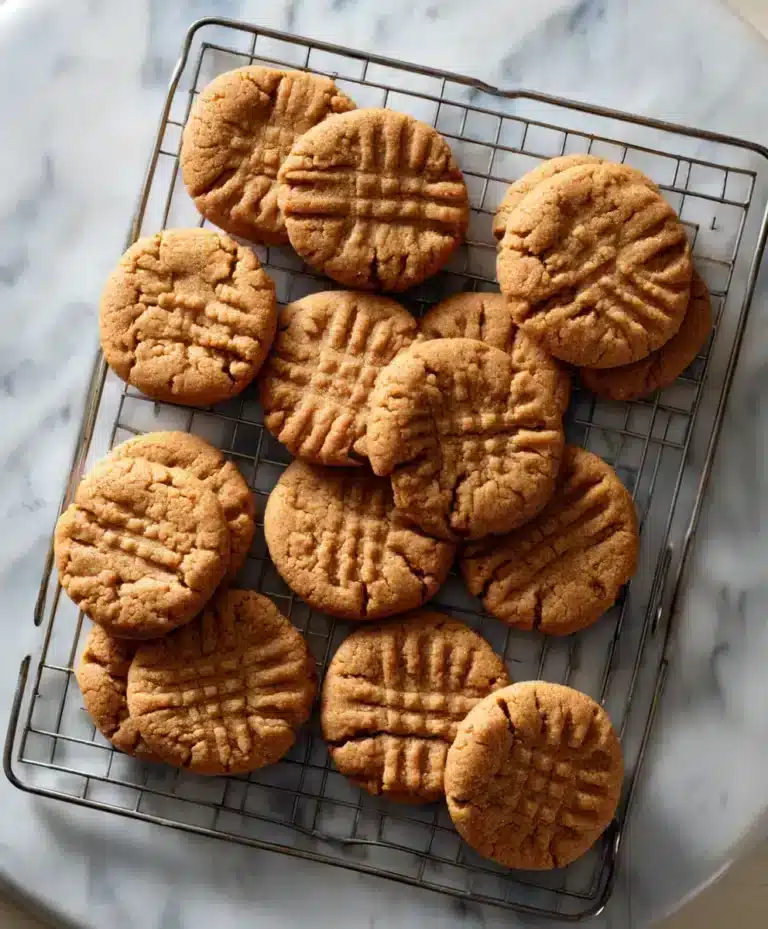
3 Ingredient Peanut Butter Cookies: Easy, Quick & Delicious
These soft, chewy, naturally gluten-free peanut butter cookies come together with just 3 pantry staples—no mixer, no flour, no fuss. A nostalgic, foolproof treat for last-minute cravings or baking with kids.
- Total Time: 15 minutes
- Yield: 18 cookies 1x
Ingredients
- 1 cup creamy peanut butter (like Jif or Skippy)
- 1 cup granulated sugar
- 1 large egg
Instructions
Preheat oven to 350°F and line a baking sheet with parchment paper.
In a medium bowl, mix peanut butter, sugar, and egg until smooth.
Scoop dough into 1-inch balls and place them on the baking sheet.
Flatten each ball with a fork, making a crisscross pattern.
Bake for 8 to 10 minutes, until the edges look set and the centers are slightly glossy.
Let cookies cool on the baking sheet for 5 to 7 minutes before transferring to a wire rack.
Notes
For egg-free options, substitute 1 flax egg (1 tbsp flaxseed + 3 tbsp water), ¼ cup mashed banana, or ¼ cup applesauce. Use creamy peanut butter for best results. Avoid overbaking to keep cookies chewy.
- Prep Time: 5 minutes
- Cook Time: 10 minutes
- Category: Dessert
- Method: Baking
- Cuisine: American
Nutrition
- Serving Size: 1 cookie
- Calories: 110
- Sugar: 9g
- Sodium: 90mg
- Fat: 7g
- Saturated Fat: 1.5g
- Unsaturated Fat: 5g
- Trans Fat: 0g
- Carbohydrates: 10g
- Fiber: 1g
- Protein: 3g
- Cholesterol: 10mg
Keywords: 3 ingredient cookies, peanut butter cookies, gluten-free, easy dessert, quick baking
Table of Contents
Why Try 3 Ingredient Peanut Butter Cookies?
The appeal of a minimalist cookie recipe
Sometimes, simplicity is everything. These cookies are a perfect example of how you don’t need a cabinet full of ingredients to bake something delicious. The recipe strips baking down to its most essential parts—just peanut butter, sugar, and egg—and somehow still delivers rich, chewy, peanutty goodness in every bite.
You don’t need a mixer. You don’t even need a bowl if you’re careful. All it takes is a spoon, a fork, and a baking tray. This is one of those recipes that sticks in your memory after just a single try. That’s the kind of kitchen magic I truly enjoy.

Benefits: fewer ingredients, quick prep, pantry staples
Let’s be honest—most of us don’t want to measure out a dozen ingredients when a cookie craving hits. With just three common pantry staples, these cookies are ready to mix and bake in under 5 minutes.
Here’s why this recipe is a keeper:
| Benefit | Description |
|---|---|
| Fast | Prep in 5 mins, bake in 10 |
| Gluten-Free | Naturally, with no flour involved |
| Kid-Friendly | Great for beginner bakers |
| Customizable | Add-ins? Yes. Egg-free? Possible. |
This is baking at its simplest. And that’s exactly why it works.
What makes these cookies special
Unlike classic drop cookies that need flour, butter, or baking soda, these flourless peanut butter cookies are soft and rich without any of that. The texture is dense but moist, and the flavor is intensely peanut buttery—like a Reese’s without the chocolate.
Plus, because there’s no flour, they’re naturally gluten-free, making them perfect for friends or family with dietary restrictions. Add to that the joy of not needing to chill the dough or wait around for fancy steps, and it’s a winner in every way.
What are the three ingredients in 3‑ingredient peanut butter cookies?
Peanut Butter – Choosing the Right One
This is the heart of your cookie. It’s the fat, the flavor, the texture—it does all the heavy lifting here. But not all peanut butters behave the same in baking.
For best results, use creamy peanut butter like Jif or Skippy. These brands have just enough added oil and stabilizers to create a smooth, consistent dough that holds its shape when baked. Natural peanut butters (the kind you have to stir) can work, but they sometimes separate or lead to crumbly cookies.
Pro tip: If you love a little texture, you can try chunky peanut butter for an extra nutty crunch!
| Type | Best For | Notes |
|---|---|---|
| Creamy | Soft, uniform cookies | Most reliable texture |
| Crunchy | Texture lovers | Great crunch, same taste |
| Natural | Healthier options | May cause spreading or crumbly dough |
Sugar – Sweetness and Structure
White granulated sugar is the classic choice here. It not only sweetens the cookies but also adds structure and that soft, melt-in-your-mouth chew.
If you’re trying to cut down on refined sugar, coconut sugar or even brown sugar can be used. Just remember: brown sugar adds a slight molasses flavor and extra softness, while coconut sugar may change the texture slightly.
Alternative sweeteners: Stevia blends or monk fruit sugar can be swapped in for low-carb or keto versions, though it may take some experimenting.
Egg – The Binding Power
The egg brings it all together. It helps the sugar and peanut butter hold shape, adds a little lift, and ensures the cookies don’t fall apart when you bite into them.
You don’t even need to beat the egg—just crack it straight into the bowl with your other two ingredients. Stir it up and that’s it.
Want to go egg-free? You’re not out of luck. You can use:
- 1 tbsp ground flaxseed + 3 tbsp water (flax egg)
- Chia egg (same ratio as flax)
- ¼ cup mashed banana or applesauce
These work surprisingly well, especially for a soft and chewy finish.
Discover great ideas like our Easter Egg Peanut Butter Candies if you’re avoiding eggs altogether.
Optional Tweaks That Still Keep it “3 Ingredient-ish”
Okay, it’s technically more than three—but a pinch of salt or splash of vanilla extract goes a long way in rounding out the flavors. Totally optional, but highly recommended if you like a more “complete” cookie taste.
Are 3‑Ingredient Peanut Butter Cookies Gluten‑Free?
Why They Can Be Naturally Gluten-Free
The beauty of these cookies? They’re naturally gluten-free—as long as you stick to the basic three ingredients. Since there’s no flour, no baking powder, and no tricky fillers, they’re a safe bet for folks with gluten sensitivities or celiac disease.
That means you can whip these up for gluten-free guests without hunting down specialty flours or fancy blends. Just peanut butter, sugar, and egg—that’s it!
Looking for inspiration? Try our Peanut Butter Pancakes from Scratch, So Easy And Delicious!
Possible Pitfalls (Cross-Contamination)
Here’s where you need to be a little cautious. Not all peanut butter is made in gluten-free facilities. Some brands might share equipment with wheat products, which can lead to cross-contamination—even if there’s no gluten in the ingredient list.

Watch out for:
- Peanut butter labeled with “may contain traces of wheat”
- Non-certified sugars that are processed in mixed-use plants
- Store brands with vague ingredient sourcing
Pro tip: Look for certified gluten-free labels on your peanut butter and sugar if you’re baking for someone with celiac disease.
| Ingredient | Gluten Risk | Best Option |
|---|---|---|
| Peanut Butter | Possible cross-contact | Certified GF brands |
| Sugar | Low risk | Organic or certified GF |
| Egg | None | All eggs are naturally GF |
Tips for Ensuring a Safe Gluten-Free Cookie
- Always check the label—even “safe” brands can change suppliers.
- Wipe down prep surfaces and use clean baking sheets.
- Don’t reuse spoons or bowls that handled wheat-based ingredients.
- Store baked cookies in a separate, labeled container if your kitchen isn’t 100% gluten-free.
How Long Should You Bake 3‑Ingredient Peanut Butter Cookies?
Standard Bake Times & Temperatures
These cookies are quick in every way—including baking. Preheat your oven to 350°F (175°C) and bake for 8 to 10 minutes. That’s it.
The goal here isn’t a crispy cookie—it’s a soft, chewy center with just the right set around the edges. And trust me, they’ll keep baking a little after you pull them from the oven, thanks to residual heat.
| Oven Temp | Bake Time | Texture Result |
|---|---|---|
| 350°F | 8 min | Soft & slightly underbaked |
| 350°F | 10 min | Firmer edges, still chewy center |
| 375°F | 7–8 min | More browning, crispier edge |
Don’t miss our The Best Chocolate Chip Cookie for Every Occasion.
Signs the Cookies Are Done
Because there’s no flour in the dough, you won’t get that golden-brown look like traditional cookies. Instead, here’s what to look for:
- Edges look set but not brown
- Centers are puffed, slightly glossy
- The bottom lifts easily with a spatula but doesn’t feel mushy
You might feel tempted to bake longer—don’t! Overbaking makes them dry and crumbly.


Adjusting for Oven Variances or Dough Thickness
Every oven has a personality (mine likes to run hot!), so keep a close eye the first time you bake. Here are a few easy adjustments:
- If your cookies spread too much, chill the dough for 10–15 minutes before baking.
- If they’re too thick or stay domed, flatten slightly with a fork before baking.
- Always test with one cookie first to dial in your ideal time.
And yes—you can totally freeze extra dough balls and bake straight from frozen. Just add 1–2 minutes to your timer.


Why Do My 3‑Ingredient Peanut Butter Cookies Fall Apart?
Common Mistakes That Lead to Crumbly Cookies
If your cookies are falling apart before they reach your plate—or worse, while you’re eating them—you’re not alone. This recipe is simple, but small tweaks make a big difference.
Let’s look at the most common reasons they crumble:
- Underbaking: They look done, but they’re too soft and haven’t set up.
- Overbaking: They bake too long and dry out fast.
- Wrong peanut butter: Natural peanut butters often separate, creating a greasy, unstable dough.
- Overmixing or undermixing: The dough should be smooth and uniform.
Discover great ideas like our Gooey Peanut Butter and Jelly Traybake for more baking success.
Dough Too Soft or Wet – How to Fix It
Sometimes, even before baking, you can tell the dough’s not quite right. If it feels too slick or runny, don’t panic. Just chill it.
Chill the dough in the fridge for 15–20 minutes. This helps solidify the fat and makes it easier to shape and bake.
| Problem | Cause | Fix |
|---|---|---|
| Dough spreads too much | Too soft, warm, or oily | Chill before baking |
| Cookies fall apart | Underbaked or too dry | Adjust bake time or reduce oven temp |
| Crumbly texture | Natural PB or no egg | Try a creamier peanut butter or add a flax egg |
Letting Them Cool Properly Matters
One of the easiest mistakes? Moving cookies too soon. These babies need to cool on the baking sheet for at least 5–7 minutes. Right out of the oven, they’re fragile and gooey. Once they rest, they’ll set and lift cleanly.
So resist the urge! Leave them be, and they’ll thank you later.

Can You Make 3‑Ingredient Peanut Butter Cookies Without Eggs?
Egg’s Role as Binder
In the classic 3-ingredient recipe, the egg acts like glue—binding the peanut butter and sugar together so the cookies hold their shape. It also gives a bit of puffiness and helps the centers set properly during baking.
But here’s the good news: you absolutely can make them egg-free, and they’ll still taste amazing. The texture may change slightly (more tender, less chewy), but the peanut butter flavor shines just the same.
Don’t miss our Perfect Chocolate Mint Cookies. Ideal for anyone who loves the classic combination of chocolate and mint, they’re sure to impress with every bite!
Best Egg Substitutes for 3-Ingredient Cookies
Here are four tried-and-true swaps for one egg in this recipe:
| Substitute | Amount | Texture |
|---|---|---|
| Flax egg | 1 tbsp ground flax + 3 tbsp water | Soft, slightly chewy |
| Chia egg | 1 tbsp chia seeds + 3 tbsp water | Slight crunch, holds well |
| Mashed banana | ¼ cup ripe banana | Soft, moist, a hint of banana flavor |
| Applesauce | ¼ cup unsweetened applesauce | Soft and slightly cakey |
How to make a flax egg:
In a small bowl, mix 1 tablespoon of ground flaxseed with 3 tablespoons of water. Let it sit for 5–10 minutes until it turns gel-like. Use just like an egg!
Texture and Binding with No-Egg Options
Egg-free cookies tend to be:
- A bit softer and more fragile
- Less chewy, more tender
- More cake-like if using applesauce
To help firm them up, try chilling the dough before baking and flattening the cookies slightly before putting them in the oven.
Pro tip: Add a pinch of baking soda if you’re going egg-free. It adds a little lift and better texture.
How Do You Store 3‑Ingredient Peanut Butter Cookies to Keep Them Soft?
Best Storage Methods (Airtight Containers Are Key)
Once your cookies are baked and cooled, the trick to keeping them soft is all about how you store them. These cookies may not have preservatives or flour, but they’re just as sensitive to air and moisture.
Store them in an airtight container as soon as they cool. A sealed plastic or glass container works great.
Here’s a storage method I use at home:
- Place a layer of cookies in the container
- Add a piece of parchment paper
- Stack another layer of cookies on top
- Drop in a slice of soft white bread—yep, bread! It keeps the cookies moist
The cookies will absorb moisture from the bread, not the air, helping them stay perfectly chewy.

Room Temperature vs Fridge vs Freezer
Let’s break down your options depending on how long you want to keep them around:
| Storage | How Long | Notes |
|---|---|---|
| Room Temp | 4–5 days | Keep sealed; don’t refrigerate |
| Refrigerator | 7–10 days | Can dry out—use airtight container |
| Freezer | 2–3 months | Freeze in layers with parchment between |
If you freeze them, let cookies thaw at room temperature for 15–20 minutes before eating. You can also warm them in the microwave for 5–8 seconds for that fresh-baked feel.
Refreshing “Stale” Cookies
If your cookies do start to dry out:
- Place them in a sealed container with a slice of bread for 12 hours
- Warm them slightly in the microwave
- Or sprinkle lightly with water and warm them in the oven at 300°F for 4–5 minutes
This softens them right back up—like new!

Variations & Add‑Ins to Elevate Your 3‑Ingredient Cookies
Mix‑Ins That Make a Big Difference
Yes, these cookies are amazing on their own—but a few extra touches can take them from simple to next-level delicious. Think of the basic recipe as your canvas, and now we’re adding the fun.
Here are a few of my favorite mix-ins to stir in before baking:
| Add-In | Amount | Flavor Boost |
|---|---|---|
| Chocolate chips | ½ cup | Classic PB + chocolate combo |
| Chopped peanuts | ¼ cup | More crunch and texture |
| Mini M&Ms | ½ cup | Kid-approved color & fun |
| Cinnamon | ½ tsp | Warm, cozy flavor |
| Sea salt (sprinkle on top) | Pinch | Sweet & salty perfection |
You can mix and match, too. Chocolate chips + sea salt = magic.
Looking for inspiration? Try our Best Carrot Cake Cookies for an easy add-in idea.
Rolling in Sugar or Cocoa Before Baking
Here’s a tip straight from my grandma: roll each dough ball in granulated sugar or unsweetened cocoa powder before pressing with a fork. It adds a slight crunch and helps the cookies hold shape better in the oven.
It’s optional—but try it once and you might never skip this step again.
| Coating | Texture Boost | Flavor Note |
|---|---|---|
| Granulated sugar | Crunchy edge | Slightly sweeter |
| Cocoa powder | Dry finish | Bitter chocolate contrast |
| Cinnamon sugar | Spiced crust | Cozy warmth |
Swapping Peanut Butter for Other Nut or Seed Butters
Can’t do peanut butter? You’ve got options. Almost any nut or seed butter will work as long as it’s not too runny.
Try these swaps using the same amount:
- Almond butter – a bit milder, but just as rich
- Cashew butter – creamier, slightly sweet
- Sunflower seed butter – nut-free and allergy-friendly
Just make sure your butter is smooth and well-stirred. Natural spreads may still need a little chilling before baking to keep the cookies from spreading too much.
Troubleshooting & Tips for Perfect 3‑Ingredient Peanut Butter Cookies
Quick Reference Table: Common Issues and Easy Fixes
This recipe is simple, but even the easiest cookies can go sideways if you’re not sure what’s happening. Here’s a handy table to help you troubleshoot quickly:
| Problem | Likely Cause | Easy Fix |
|---|---|---|
| Cookies fall apart | Underbaked or too dry | Bake 1–2 mins longer, use creamier PB |
| Spread too thin | Dough too warm or runny | Chill dough before baking |
| Too dry/crumbly | Overbaked or wrong PB | Shorten bake time, switch to processed PB |
| Sticky dough | Natural PB or hot kitchen | Chill dough or add a spoon of oats |
| Burned bottoms | Thin pan or oven runs hot | Use parchment, check temp with thermometer |
Batch Size Scaling & Freezing Dough
Want more cookies? You can double or triple this recipe with no problem. Just be sure to:
- Use a stand mixer or sturdy spoon if scaling up
- Chill the dough longer if making a large batch
- Bake in batches so the cookies don’t overcrowd the tray
To freeze the dough:
Roll into balls and freeze on a tray. Once frozen, store in a zip-top bag. Bake straight from frozen at 350°F—add 1–2 extra minutes.
Make-Ahead Tips & Serving Ideas
These cookies are a baker’s dream when you’re short on time. You can:
- Make the dough up to 3 days in advance and chill it
- Bake ahead and store in an airtight container for up to a week
- Serve with a glass of cold milk, dipped in dark chocolate, or even crumbled over ice cream
Don’t miss our Cherry Yum Yum Recipe for more sweet serving ideas.
FAQs About 3 Ingredient Peanut Butter Cookies
The classic recipe includes just peanut butter, granulated sugar, and an egg. These three ingredients combine to make a rich, chewy, naturally gluten-free cookie without the need for flour or butter. It’s the ultimate simple sweet treat.
Yes, they are naturally gluten-free! Since there’s no flour involved, they’re safe for gluten-sensitive folks—just make sure your peanut butter and sugar are processed in gluten-free facilities to avoid any cross-contamination.
Bake them at 350°F for 8 to 10 minutes. Look for edges that are set and a slightly glossy center. They’ll continue to firm up as they cool, so don’t overbake!
Usually, it’s due to overbaking, underbaking, or using natural peanut butter that’s too oily. Try chilling the dough, using creamy peanut butter, and letting the cookies rest on the baking sheet for 5–7 minutes before moving them.
Absolutely! Try using a flax egg, chia egg, mashed banana, or unsweetened applesauce as an egg replacement. Your cookies will be slightly softer but still delicious and dairy-free.
Store them in an airtight container with a slice of white bread to help retain moisture. They’ll stay soft at room temperature for up to 5 days, or freeze them for longer storage.
Conclusion
Whether you’re a busy parent, a college student, or just someone craving something sweet without a lot of effort, these 3 ingredient peanut butter cookies are a total game-changer. They remind me of baking with my kids after school—laughing, scooping, and sneaking a taste of dough. No stress, no fuss—just good old-fashioned comfort.
What I love most is how forgiving and fun they are. You can dress them up or keep them plain. Go egg-free, gluten-free, or throw in chocolate chips. However you make them, they’re a quick win in the kitchen—and those are the best kind, aren’t they?
Thanks for baking with me today. I hope this recipe becomes a staple in your kitchen like it has in mine. And if you try a new twist or tip, I’d love to hear about it. Happy baking, friend!